Setting up a TypeScript Project: 3 Approaches
Welcome to Part 2 of this series! Here we will go on a tour of the JavaScript tools ecosystem. This part is not about React (we’ll get to that in Part 5) but it does include a simple React component.
This is somewhat of a grand tour, so we’ll talk about writing your app in three different ways (with a summary afterward):
- A. The Easiest Way (with Parcel)
- B. The Way of Fewest Tools (i.e. the do-it-yourself way)
- C. The Webpack way
Common Steps
The first six steps are the same in all approaches, so let’s get started!
Step 1: Install Node.js/npm
If you haven’t yet, go install Node.js which includes the command-line package manager, npm. (If you want to deploy your app on some other web server, I recommend worrying about how to do that later.)
Step 2: Install Visual Studio Code or other editor
One of the main reasons to use TypeScript instead of JavaScript is that it supports code completion features (also known as IntelliSense).
To enjoy this benefit, you’ll need to edit your TypeScript .ts files in a compatible editor such as Visual Studio Code - which is free and multiplatform. It’s also the most popular text editor for JavaScript apps (alternatives include Atom and Sublime Text.)
Visual Studio Code is folder-oriented: you open a folder in VS Code and that folder will be treated like the current “project”. During installation (on Windows, anyway) it will offer a checkbox to add an “Open with Code” action for folders (directories). I recommend using that option as an easy way to start VS Code from any folder:

Create an empty folder for your app, then open that folder in VS Code. Notice that VS Code has a built-in terminal so you won’t need a separate terminal window.
Step 3: Set up package.json
The package.json file will represent your project configuration (including its name, build commands, the list of npm modules used by your project, and more).
If you haven’t done so yet, create an empty folder for your app and open a terminal window in that folder.
In the terminal, run npm init. npm init will ask you some questions in order to produce package.json. Leave a field blank to accept the default suggestion.
I wanted to make a small educational app to draw some graphs demonstrating how climate science explains the 20th century temperature record. So I called my app climate-app:
C:\Dev\climate-app>npm init
This utility will walk you through creating a package.json file.
It only covers the most common items, and tries to guess sensible defaults.
[....]

package name: (climate-app)
version: (1.0.0)
description: Demo to visualize climate data
entry point: (index.js)
test command:
git repository:
keywords:
author: David Piepgrass
license: (ISC) MIT

About to write to C:\Dev\climate-app\package.json:
{
  "name": "climate-app",
  "version": "1.0.0",
  "description": "Demo to visualize climate data",
  "main": "index.js",
  "scripts": {
    "test": "echo \"Error: no test specified\" && exit 1"
  },
  "author": "David Piepgrass",
  "license": "MIT"
}

Is this ok? (yes)
Notice the reference to index.js. Oddly, this file does not need to exist and we won’t be using it. It is used only if you share your code via npm.
Step 4: Install Typescript
VS Code reportedly has TypeScript “language support” rather than a TypeScript compiler, so now we need to install the compiler.
There are two ways to install TypeScript with npm. Either use
npm install --global typescript
or
npm install --save-dev typescript
If you use the --global option then the TypeScript compiler tsc will be available in all projects on the same machine and it will be available as a terminal command, but it will not be added to your package.json file. Therefore, if you share your code with others, TypeScript will not be installed automatically when another person gets your code and runs npm install.
If you use --save-dev, TypeScript will be added to package.json and installed in your project’s node_modules folder (current size: 34.2 MB), but it will not be available directly as a terminal command, although you can still run it from the terminal as ./node_modules/.bin/tsc, and you can still use tsc inside the npm "scripts" section of package.json.
Fun fact: the TypeScript compiler is multiplatform because it is written in TypeScript (and compiled to JavaScript).
Step 5: Install React or Preact
To add React to your project:
npm install react react-dom
npm install --save-dev @types/react @types/react-dom
Note: as you can see, you can install multiple packages with one command. --save-dev marks things as “used for development” while --save (which is the default, and therefore optional) means “used by your code when it is deployed”. @types packages provide type information to TypeScript, but they are not used when your code is running/deployed. If you forget --save-dev or if you use it on the wrong package, your project will still work; the distinction is only important if you share your project as an npm package.
Alternately you can use Preact, which is almost the same as React but more than 10 times smaller. Preact has TypeScript type definitions built-in, so you only need a single command to install it:
npm install preact
Tip: npm i is a shortcut for npm install.
Note: do not to install preact and @types/react in the same project, or tsc will go insane and give you about 150 errors (see preact issue #639). If this happens, uninstall the React types with npm uninstall @types/react @types/react-dom
Step 6: Write some React code
Make a file called app.tsx with this small React program:
import * as React from 'react';
import * as ReactDOM from 'react-dom';

class App extends React.Component<{greeting: string}, {count:number}> {
  state = {count: 0};
  render() {
    return (
      <div>
        <h2>{this.props.greeting}</h2>
        <button onClick={() => this.setState({count: this.state.count+1})}>
          This button has been clicked {this.state.count} times.
        </button>
      </div>);
  }
}

ReactDOM.render(
  <App greeting="Hello, world!"/>,
  document.getElementById('app')
);
Note: in order for the embedded JSX (HTML/XML) to work, the file extension must be tsx, not ts. If you have any trouble making your code work, try this code instead, it’s the simplest possible React program:
import * as ReactDOM from 'react-dom';
import * as React from 'react';

ReactDOM.render(React.createElement("h2", null, "Hello, world!"), document.body);
We’ll discuss how the code works later; for now let’s focus on making it run.
If you’re using preact, change the first two lines like so:
import * as React from 'preact';
import * as ReactDOM from 'preact';
Some notes about Preact:
- There is a preact-compat library which allows you to use preact with zero changes to your React code. Usage instructions exist only for users of Webpack/Browserify/Babel/Brunch, but this page shows how to use preact-compat with Parcel.
- There are rumors that in Preact you should write
/** @jsx h */at the top of the file, which tells TypeScript to callh()instead of the defaultReact.createElement. In this case you must not do that or you’ll get a error in your browser thathis not defined (React.h, however, is defined). In fact Preact definescreateElementas an alias forh, and since ourimportstatement assigns'preact'toReact,React.createElementexists and works just fine.
Optional: running TypeScript scripts
This tutorial is focused on making web pages that run TypeScript code. If you would like to run a TypeScript file directly from the command prompt, the easiest way is to use ts-node:
npm install --global ts-node
After installing ts-node, run ts-node X.ts where X.ts is the name of a script you want to run. In the script you can call console.log("Hello") to write text to the terminal (reading text from a user is more complicated). On Linux systems you can put a “shebang” at the top of the script if you would like to be able to run ./X.ts directly (without mentioning ts-node):
#!/usr/bin/env ts-node
Note: if you don’t need to run ts files from a terminal then you don’t need to install ts-node.
Running your project, Approach A: The Easy Way
I discovered Parcel when I was about two-thirds done writing this article. Honestly, if I knew about Parcel from the beginning I might not have bothered writing about the other approaches. Don’t get me started on how easy Parcel is! It deserves a damn medal!
It’s very large though (81.9 MB), so you should install it as a global:
npm install --global parcel-bundler
The truth is I’ve been lying to you. Parcel is so easy, you don’t even need all six steps above! You only really need Steps 1, 2 and 6 (install Node, install an editor and write some code) because Parcel will do steps 3, 4, and 5 for you automatically.
So all we have to do now is to create an index.html file that refers to our app.tsx file, like this:
<!DOCTYPE html>
<html>
<head>
<title>App</title>
<meta charset="utf-8"/>
</head>
<body>
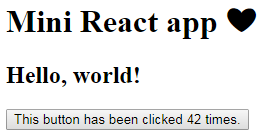
<h1>Mini React app ❤</h1>
<div id="app"></div>
<script src="app.tsx"></script>
</body>
</html>
Then, simply open a terminal in the same folder and run the command parcel index.html.

This can’t run directly in a browser, of course, so Parcel
- Automatically compiles app.tsx
- Installs React or Preact because it notices that you’re using it
- Bundles your app with its dependencies into a single file called
app.dd451710.js(or some other funny name) - Creates a modified
index.htmlthat refers to the compiled & bundled app - Puts these new files in a folder called
dist.
And then it does everything else for you:
- It runs your app on a mini web server at http://127.0.0.1:1234 (viewable on a web browser on the same machine).
- It watches for changes to your code (app.tsx and index.html) and recompiles when you change them.
- As if that wasn’t enough, when your files change, it will send a command to your web browser to automatically refresh!
- Even better, it updates the page without fully reloading it using its Hot Module Replacement feature.
It can be challenging to set up a conventional build that does all of these things; this tutorial only covers how to do #1 and #2 in a conventional build, with only code recompilation (not HTML).
To learn about more features of Parcel, have a look at the Parcel documentation.
One limitation of Parcel is that it doesn’t perform type checking (your code is translated to JavaScript but type errors are not detected). For small projects, this is not a big problem because Visual Studio Code performs its own type checking. It gives you red squiggly underlines to indicate errors and all errors are listed in the “Problems” pane (press Ctrl+Shift+M to show it). But if you want, you can npm install parcel-plugin-typescript for enhanced TypeScript support including type checking.
Other approaches
The other approaches are more well-known and standard practise in the JavaScript community. We will be creating a folder with the following files inside:
- app/index.html
- app/app.tsx
- package.json
- tsconfig.json
- server.js
- webpack.config.js (optional)
As a matter of communicating to other people who look at your code later, it is useful to separate your program’s front-end code from its build configuration and app server. The root folder of a project tends to become cluttered with extra files over time (e.g. .gitignore if you use git, README and LICENSE files, appveyor/travis files if you use continuous integration, etc.) Therefore we should separate the code of our front end into a different folder.
In addition to the files we create, TypeScript will compile app.tsx into app.js and app.js.map, while npm creates a folder called node_modules and a file called package-lock.json (The name “lock” seems strange to me, but this page explains why it exists.)
So please begin by creating an app folder and putting your app.tsx there.
Running your project, Approach B: The Way of Fewest Tools
It seems like everybody’s JavaScript project uses a dozen tools plus the kitchen sink. Is it possible to make a small program without any extra tools? It certainly is! Here’s how.
Step B1: Create tsconfig.json
Create a text file called tsconfig.json (in your root folder) and put this code in it:
{ // TypeScript configuration file: provides options to the TypeScript
  // compiler (tsc) and makes VSCode recognize this folder as a TS project,
  // enabling the VSCode build tasks "tsc: build" and "tsc: watch".
  "compilerOptions": {
    "target": "es5",            // Compatible with older browsers
    "module": "umd",            // Compatible with both Node.js and browser
    "moduleResolution": "node", // Tell tsc to look in node_modules for modules
    "sourceMap": true,          // Creates *.js.map files
    "jsx": "react",             // Causes inline XML (JSX code) to be expanded
    "strict": true,             // Strict types, eg. prohibits `var x=0; x=null`
    "alwaysStrict": true,       // Enable JavaScript's "use strict" mode
    "esModuleInterop": true     // CommonJS import behavior similar to Babel/mjs
  },
  "include": ["**/*.ts", "**/*.tsx"],
  "exclude": ["node_modules"]
}
This file marks the folder as a TypeScript project and enables build commands in VSCode with Ctrl+Shift+B (the “tsc: watch” command is useful - it will automatically recompile your code whenever you save it.) Silly fact: tsc allows comments in json files but npm does not.
This file is very important because if the settings aren’t right, something may go wrong and mysterious errors may punch you in the face. Here is the documentation of tsconfig.json, but compiler options are documented separately.).
A quicker way to create tsconfig.json is to run tsc --init in a terminal.
Step B2: Add a build script
To allow npm to build your TypeScript code, you must also add entries in the “scripts” part of package.json. Modify that section so it looks like this:
"scripts": {
  "test": "echo \"Error: no tests installed\" && exit 1",
  "build": "tsc",
  "start": "node server.js"
},
The build script simply runs tsc which compiles your code according to the options in tsconfig.json, and to invoke this script you write npm run build on the command line.
“But wait!” you may be thinking. “It’s really much easier to type tsc than npm run build!” That’s true, but there are two reasons to define a build script:
- If you installed TypeScript with
--save-devbut not--global, you can’t runtscdirectly from the command line because it’s not in the PATH. - There’s a good chance your build process will become more complicated later. By creating a build script you can easily add other commands to the build process later.
Note: npm runs the prestart script automatically whenever someone runs the start script, so you could add this additional an additional script:
"prestart": "npm run build",
This would build your project whenever you start your server with npm start or npm run start. But this has two disadvantages: one, tsc is a bit slow; two, if tsc finds type errors then your server won’t start. When TypeScript detects type errors, that doesn’t stop it from writing JavaScript output files, and you may find it is occasionally useful to run your code even with type errors.
The default behavior of npm start is to run node server.js, so it seems redundant to include "start": "node server.js". However, if your server is written in TypeScript you’ll need this line because server.js doesn’t exist until server.ts is compiled, and if server.js doesn’t exist, npm start will give the error missing script: start unless you include this line.
Step B3: Make a simple server
To make sure Node.js is working, create a text file called server.js and put this code in it:
const http = require('http');

http.createServer(function (request, response) {
  // Send HTTP headers and body with status 200 (meaning "OK", success)
  response.writeHead(200, {'Content-Type': 'text/html'});
  response.end(`
    <html><body>
      <h1>Hello, world!</h1>
      You asked for: ${request.url}
    </body></html>`);
}).listen(1234);
Run npm start to start it, visit http://127.0.0.1:1234/index.html to make sure it works, then press Ctrl+C to stop the server.
To get IntelliSense for Node.js, you need to install type information for it with this command:
npm install @types/node --save-dev
Then in VS Code, type http. to make sure it works:
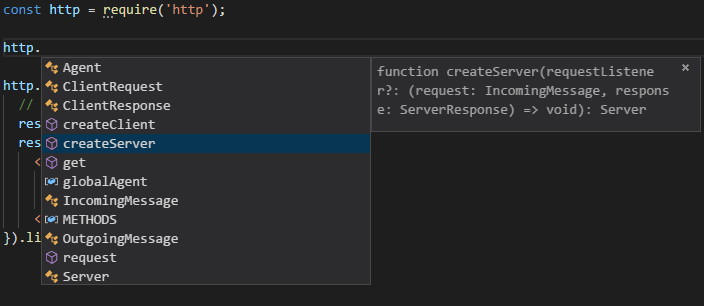
Behind the scenes, VS Code uses the TypeScript engine for this. However, if you rename your file to server.ts, IntelliSense doesn’t work! Is TypeScript broken in Node.js? Not really. TypeScript can still compile it, it just doesn’t grok require in a .ts context. So in TypeScript files, you should use import instead of require:
import * as http from 'http';
Note: this is confusingly different from Node’s .mjs files, which require import http from 'http'; (Details)
TypeScript then converts import to require in its output (because of the "module": "commonjs" option in tsconfig.json.)
Now let’s change our server so it can serve any file from our /app folder:
var http = require("http"); // http server
var fs   = require("fs");   // file system access
var url  = require("url");  // url parser
var path = require("path"); // file path parser

// You can choose the port via command line, e.g. node server.js 3000
const port = process.argv[2] || '1234';
const folderToServe = 'app';
const mimeTypes = {
  '.ico': 'image/x-icon',
  '.html': 'text/html',
  '.js': 'text/javascript',
  '.json': 'application/json',
  '.css': 'text/css',
  '.png': 'image/png',
  '.jpg': 'image/jpeg',
  '.svg': 'image/svg+xml',
  '.pdf': 'application/pdf',
  '.ttf': 'aplication/font-sfnt'
};
// Each triplet is a URL prefix, a folder to serve, and the default
// filename to use when a folder is resolved. Longest prefixes first!
const routes = [['/node_modules/', 'node_modules', 'index.js'],
                ['/', 'app', 'index.html']];

http.createServer(function (request, response) {
  console.log(`${request.method} ${request.url}`);

  let parsedUrl = url.parse(request.url);
  // Figure out which of the routes applies to the requested URL
  let route = routes.filter(r => r[0] == parsedUrl.pathname.substr(0, r[0].length))[0];
  // Figure out the path of the file in the real file system
  let filePath = route[1] + '/' + parsedUrl.pathname.substr(route[0].length);

  // Check whether the file exists and whether it is actually a folder
  fs.stat(filePath, (err, fileInfo) => {
    if (err) {
      response.statusCode = 404;
      response.end("Error: " + err.message);
    } else {
      if (fileInfo.isDirectory())
        filePath += '/' + route[2];

      // Read the file and send it to the user's web browser
      fs.readFile(filePath, (err, data) => {
        if (err) {
          response.statusCode = 404;
          response.end("Read error: " + err.message);
        } else {
          let ext = path.extname(filePath);
          let mimeType = mimeTypes[ext] || 'application/octet-stream';
          response.writeHead(200, {'Content-Type': mimeType});
          response.end(data);
        }
      });
    }
  });
}).listen(parseInt(port));

console.log(`Server running: http://127.0.0.1:${port}`);
You’ll notice that this code has some funny… nesting. That’s because Node.js functions are normally asynchronous. When you call functions in fs, instead of returning a result, they pause your program until they are done and then they call a function provided by you, sending that function either an error (err) or some information (fileInfo). For example, instead of returning information about a file, fs.stat sends information to a callback.
A fishy thing about this web server is that it ignores request.method, treating every request as if it were a get. But it works well enough to get started.
Step B4 (optional): Use Express
If you want your server side to do any “routing” that is more complicated than serving a few files, you should probably learn about the most popular Node.js server framework: Express.
If we use Express, our server code will be much shorter. Just install it with npm install express and put the following code in server.js:
const express = require('express');
const app = express();

app.use('/node_modules', express.static('node_modules'));
app.use('/', express.static('app'));
app.listen(1234, () => console.log('Express server running at http://127.0.0.1:1234'));
Step B5: Make a web page to hold your app
Finally, in your app folder, create an index.html file in there to load your app:
<!DOCTYPE html>
<html>
<head>
  <title>App</title>
  <meta charset="utf-8"/>
  <script src="node_modules/react/umd/react.development.js"></script>
  <script src="node_modules/react-dom/umd/react-dom.development.js"></script>
  <script src="node_modules/preact/dist/preact.dev.js"></script>
  <script>
    module = {exports:{}}; exports = {};
    window.require = function(name) { return window[name]; };
    window['react'] = window['React'];
    window['react-dom'] = window['ReactDOM'];
  </script>
</head>
<body>
  <h1>Mini React app ❤</h1>
  <div id="app"></div>
  <script src="app.js"></script>
</body>
</html>
This page includes both React (react.development.js and react-dom.development.js) and Preact (preact.dev.js) so I don’t need to give you separate instructions for each one. You can remove whichever one you aren’t using, but the page can still load with unresolved script elements.
At this point you should be able to build your code (npm run build), start your server (npm start) and visit http://127.0.0.1:1234 to view your app!
Remember, you can recompile your code automatically in VS Code: press Ctrl+Shift+B and choose “tsc: watch”.
Note: It’s important to load app.js at the end of the body, or React will say Error: Target container is not a DOM element because app.js would be calling document.getElementById('app') before the app element exists.
At this point it’s worth noting that this code is a little hacky. Especially this part:
  <script>
    module = {exports:{}}; exports = {};
    window.require = function(name) { return window[name]; };
    window['react'] = window['React'];
    window['react-dom'] = window['ReactDOM'];
  </script>
What’s this for? The short answer is that if your code contains import, TypeScript cannot produce code that “just works” in a browser, and this is one of many possible workarounds for that problem.
The long answer? First of all, remember that the JavaScript ecosystem has multiple module systems. Right now, your tsconfig.json file uses the "module": "umd" option, because "module": "umd" and "module": "commonjs" are the only modes that can be used in both Node.js and a web browser. I asked you to make a server.js (not server.ts) file, but by using "module": "umd" you could write your server code in TypeScript if you want to.
UMD is the natural choice since it’s supposed to make a “universal” module definition, but TypeScript doesn’t really try to be universal - it simply won’t attempt to work in a web browser unaided. Instead, it expects to find predefined symbols either for an AMD module system or a CommonJS (i.e. Node.js) module system; if neither of these is defined, the module exits without even logging an error message.
Even if we could use the "module": "es6" option, which keeps import commands unchanged in the output file, it wouldn’t work because Chrome somehow still doesn’t support import in 2018. Also, the URLs of our modules have little in common with the string in our import statements, and I have learned that TypeScript path mapping aliases can’t solve the problem because they don’t change the compiler’s output.
TypeScript’s CommonJS implementation requires require to be defined, of course (it’s used to import modules), but it also looks for exports and module.exports, even though our module doesn’t export anything. So our little hack must define all three.
The UMD versions of react React, ReactDOM, and Preact set global variables called React, ReactDOM and preact respectively. But “global” variables in a browser are actually members of a special object called window. And in JavaScript, window.something means exactly the same thing as window['something'] except that you can use special characters, such as dashes, in the latter form. Therefore, window['preact'] and/or window['React'] already exist. So by defining a require function that simply returns window[name], it allows React or Preact to be imported. However, we also need to create lowercase aliases 'react' and 'react-dom' because those are the names we must use in our TypeScript code (those names are recognized by the TypeScript compiler because those are the names of the folders in node_modules).
There’s another thing in our index.html that is a bit… unfortunate:
  <script src="node_modules/react/umd/react.development.js"></script>
  <script src="node_modules/react-dom/umd/react-dom.development.js"></script>
  <script src="node_modules/preact/dist/preact.dev.js"></script>
What makes this code less than ideal?
- We already have
importstatements in ourapp.tsxfile, so it’s unfortunate that we need a separate command to load the modules in ourindex.html. - We’re specifically referring to the “development” versions of the code, which include comments and are a lot more readable than minified versions. But when we roll out our web site to a large audience we’ll want to switch to the minified versions so that pages load faster. It would be nice if we could do that without losing the debugging benefits of the development versions.
- It assumes we can access files in
node_modules, which is an unusual way to set up a server.
All the disadvantages described here lead us to want some kind of additional tool to help us deploy code to our web browser. We discussed Parcel already, but the most popular one is webpack.
Running your project, Approach C: The Webpack Way
The most popular thing to do with front-end apps is to “pack” all the modules (React + your code + anything else you need) into a single file. (This is comparable to what they call “linking” in some other languages, such as C++.) That’s basically what Parcel and webpack are built to do (Gulp is not; it requires extra tools installed separately.)
Steps C1 & C2: Create tsconfig.json and server.js
If you skipped approach B, please do steps B1 and B4 now.
Step C3: Install webpack
You could install it like this:
npm install --save-dev webpack webpack-cli
Unfortunately, webpack is oversized: these two packages have 735 dependencies weighing in at 50.9 MB (13,198 files in 1868 folders). And for some reason, webpack-cli requires the webpack package but doesn’t mark it as a dependency, hence you must install both of them explicitly. And although webpack-cli is ostensibly “just” the command-line interface for webpack’s APIs, it is disproportionately large for some reason (webpack alone is only 13.6 MB).
Due to its size, it probably makes more sense to install it as a global:
npm install --global webpack webpack-cli
When using --global, keep in mind that if you share your code with someone else, the other person won’t get webpack automatically when they type npm install, so you’ll want to explain how to install in your readme file. If you change your mind and want to switch from --save-dev to --global, just run the --global installation command and then use npm uninstall webpack webpack-cli to delete the local copy.
Step C4: Add build scripts
To allow npm to build and serve your project, add entries in the "scripts" section of package.json.
You could modify that section so it looks like this:
  "scripts": {
    "test": "echo \"Error: no tests installed\" && exit 1",
    "build":     "tsc && webpack app/app.js -o app/app.bundle.js --mode=production",
    "build:dev": "tsc && webpack app/app.js -o app/app.bundle.js --mode=development",
    "start": "node server.js"
  },
With these scripts, you would use either npm run build to build a minified production version, or npm run build:dev to build a development version with full symbols and comments. However, this is inconvenient, because when you change your code, you have to manually repeat the npm run build:dev command. In Approach B we could use tsc: watch in VS Code, but that won’t work this time because we also need to run webpack (and tsc doesn’t know that).
Can we set it up to rebuild automatically when our code changes? Yes, but we will need a webpack plugin to accomplish this. One of the plugins that can do the job is called awesome-typescript-loader. Install it like this:
npm install awesome-typescript-loader --save-dev
Then in package.json, change your "scripts" section to look lke this:
  "scripts": {
    "test": "echo \"Error: no tests installed\" && exit 1",
    "build":     "webpack app/app.tsx --module-bind tsx=awesome-typescript-loader -o app/app.bundle.js --mode=production",
    "build:dev": "webpack app/app.tsx --module-bind tsx=awesome-typescript-loader -o app/app.bundle.js --mode=development",
    "watch":     "webpack app/app.tsx --module-bind tsx=awesome-typescript-loader -o app/app.bundle.js --mode=development --watch",
    "start": "node server.js"
  },
This makes webpack fully responsible for building our TypeScript code, and therefore we can use its --watch option to watch for code changes. The command to build and watch for code changes is npm run watch.
Step C5: Start server and webpack
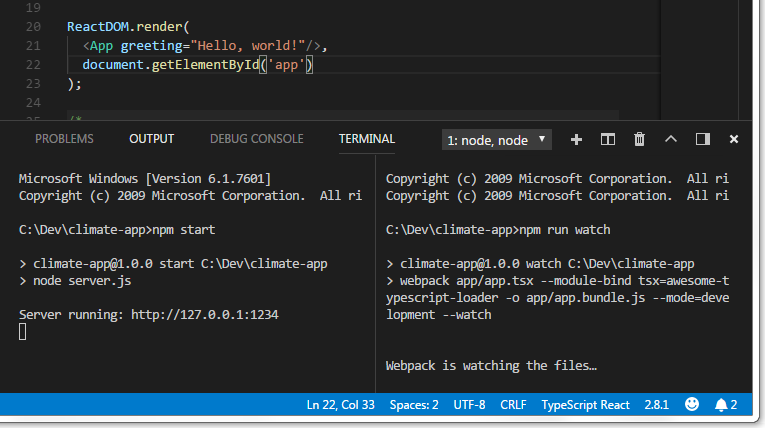
You’ll need two separate terminals, one for your build system (npm run watch) and one for your server (npm start). If your server is written in TypeScript then you need to run npm run watch first, otherwise it doesn’t matter which one you start first.
It’s worth noting that VS Code can keep track of multiple terminals. You can create two terminals and run one command in each, like this:
Step C6: Create index.html and load it
In Approach C, your index.html file is much simpler than in Approach B:
<!DOCTYPE html>
<html>
<head>
  <title>App</title>
  <meta charset="utf-8"/>
</head>
<body>
  <h1>Mini React app ❤</h1>
  <div id="app"></div>
  <script src="app.bundle.js"></script>
</body>
</html>
Visit http://127.0.0.1:1234 and the page should load. You’re done!
Step C7: Create a webpack.config.js file (optional)
Our build command is getting rather long, and is very similar for our three modes. Also, we’ve only set up the tsx file extension so webpack doesn’t know how to compile ts files yet.
The most popular way of using webpack is with a special configuration file, separate from package.json. The "build" script above becomes the following webpack.config.js file:
module.exports = {
  entry: __dirname+'/app/app.tsx',
  output: {
    path: __dirname+'/app',
    filename: 'app.bundle.js'
  },
  module: {
    rules: [
      { test: /\.(ts|tsx)$/, loader: 'awesome-typescript-loader' }
    ]
  }
};
After you create this file, change your scripts in package.json as follows:
  "scripts": {
    "test": "echo \"Error: no tests installed\" && exit 1",
    "build":     "webpack --config webpack.config.js --mode=production",
    "build:dev": "webpack --config webpack.config.js --mode=development",
    "watch":     "webpack --config webpack.config.js --mode=development --watch",
    "start": "node server.js"
  },
As before you can build and watch for changes with npm run watch, or use npm run build for a minified production build.
Next
See Part 3 for a summary of the approaches above.